

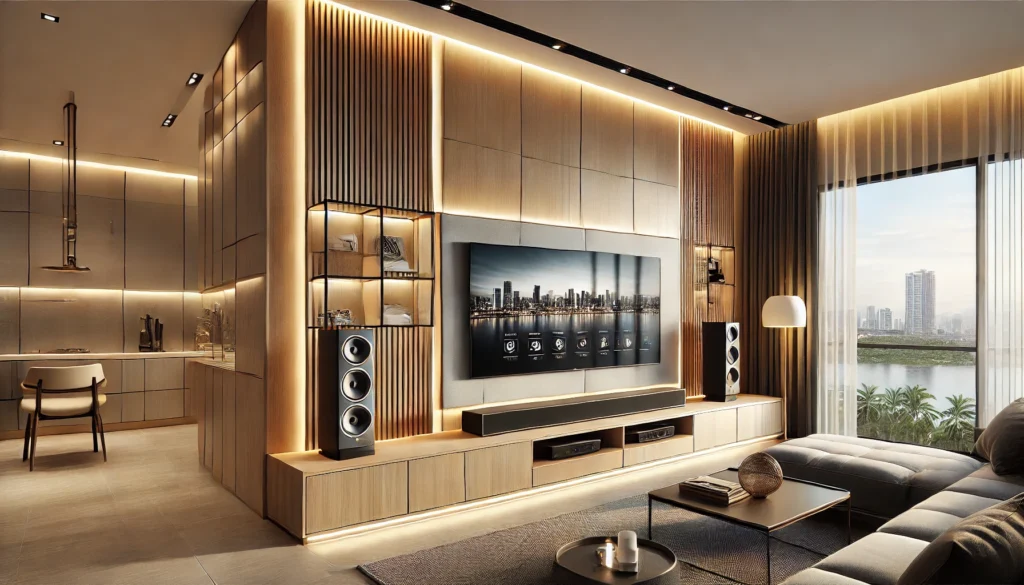
In today’s digital age, a media wall has become a central feature in modern homes, serving both as a focal point for entertainment and as a stylish statement piece. But how do you build the perfect media wall? Whether you’re a DIY enthusiast or planning to hire professionals, understanding the key elements and considerations involved in constructing a media wall is essential. This comprehensive guide will walk you through the process, from planning and design to installation and finishing touches, ensuring you create a media wall that is both functional and visually stunning.
What is a Media Wall?
A media wall, also known as an entertainment wall or feature wall, integrates various multimedia components such as TVs, speakers, gaming consoles, and sometimes even fireplaces, into a single, cohesive unit. It can transform a living room, home theatre, or bedroom into a high-tech entertainment hub. Media walls are designed not only to house electronics but also to conceal wires and cables, offering a clean and uncluttered look.
Benefits of Building a Media Wall
Building a media wall offers several advantages:
- Space Optimisation: Media walls help in maximising space by providing a dedicated area for all entertainment devices.
- Aesthetics: They can be customised to match your interior decor, adding a touch of elegance and modernity.
- Organisation: Media walls keep cables and wires neatly concealed, reducing clutter.
- Improved Viewing Experience: Properly mounted TVs and sound systems enhance your viewing and listening experience.
- Increased Home Value: A well-designed media wall can boost the value of your home.
Planning Your Media Wall
Before you start building, it’s crucial to plan your media wall meticulously. Here are the steps to follow:
- Determine the Location Choose a wall that is central and visible from most seating areas in the room. Consider factors such as natural light, which can cause glare on screens, and the proximity to power outlets.
- Measure the Space Accurate measurements are vital. Measure the height, width, and depth of the wall to ensure that your media wall fits perfectly. Also, measure your TV and other equipment to make sure they will fit within the space.
- Plan the Layout Sketch a layout of your media wall, including the placement of the TV, speakers, storage units, and any other components. Consider both functionality and aesthetics. You can use design software or consult with a professional for a more detailed plan.
- Choose Materials Select materials that match your home’s decor and are durable. Common materials include MDF, plywood, plasterboard, and high-gloss finishes. You might also incorporate elements like LED lighting, wood panelling, or stone cladding for added effect.
- Budgeting Establish a budget for your media wall project. Factor in costs for materials, tools, and labour (if you’re hiring professionals). Remember to account for additional expenses like cable management systems, brackets, and accessories.
Building the Media Wall
Once your planning is complete, it’s time to start building. Here’s a step-by-step guide:
- Prepare the Wall Start by clearing the area where the media wall will be built. Remove any existing fixtures, fill in holes, and ensure the wall surface is smooth. This is also the time to check for any structural issues that need to be addressed.
- Frame the Structure Build a frame for your media wall using timber or metal studs. This frame will support the weight of the TV and other components. Ensure that the frame is securely anchored to the wall and floor. Use a level to make sure the frame is straight.
- Run Cables and Install Power Outlets Before closing up the frame, run all necessary cables and install additional power outlets if needed. This step is crucial for a clean look, as it hides unsightly wires. Plan for HDMI cables, power cords, speaker wires, and any other connections required.
- Install the Backing Board Attach a backing board to the frame. This can be made from MDF, plywood, or plasterboard. The backing board will provide a smooth surface for mounting the TV and other components.
- Mount the TV and Components Secure the TV mount to the backing board, ensuring it is at the correct height and level. Attach the TV to the mount, and then install any other components such as speakers, shelves, and storage units. Make sure everything is firmly secured.
- Finishing Touches Finish your media wall with the chosen materials. This could include painting, applying wallpaper, or installing decorative panels. If you’ve opted for LED lighting, install it now to highlight the features of your media wall.
Customising Your Media Wall
Customisation is key to making your media wall stand out. Here are some ideas to consider:
- Lighting: Incorporate LED strip lights or spotlights to create ambient lighting. This not only enhances the visual appeal but also improves the viewing experience by reducing eye strain.
- Storage Solutions: Add cabinets, shelves, or drawers to store DVDs, remote controls, and other accessories. This helps in maintaining a tidy and organised space.
- Soundproofing: For a home theatre setup, consider soundproofing materials to enhance audio quality and minimise external noise.
- Decorative Elements: Incorporate elements like floating shelves, artwork, or even plants to personalise your media wall.
Maintenance Tips
To keep your media wall looking pristine and functioning well, follow these maintenance tips:
- Regular Cleaning: Dust your media wall regularly to prevent buildup on electronic components and surfaces.
- Cable Management: Periodically check and tidy up cables to ensure they remain concealed and organised.
- Component Care: Clean your TV and other electronics with appropriate cleaners to avoid damage.
- Inspection: Regularly inspect the structural integrity of the wall and mounts, especially if you have heavy components attached.
Common Mistakes to Avoid
When building a media wall, avoid these common pitfalls:
- Poor Planning: Skipping the planning phase can lead to design flaws and functional issues.
- Ignoring Cable Management: Visible cables can ruin the aesthetics of your media wall.
- Improper Mounting: Ensure all components are securely mounted to avoid accidents and damage.
- Overlooking Ventilation: Electronic devices generate heat, so ensure there is adequate ventilation to prevent overheating.
Professional Installation
While DIY projects can be rewarding, hiring professionals can save time and ensure a flawless finish. Professional installers have the expertise to handle complex setups and can offer valuable design advice. If you’re considering professional installation, get a quote from a reputable service provider.
Conclusion
Building the perfect media wall involves careful planning, precise execution, and a touch of creativity. By following this guide, you can create a media wall that not only enhances your entertainment experience but also adds value to your home. Whether you decide to tackle the project yourself or hire professionals, the result will be a stunning and functional feature that transforms your living space.
For expert assistance and a professional finish, get a quote from BH Bespoke today. Transform your home with a bespoke media wall that reflects your style and meets your entertainment needs. Contact us now to get started!