

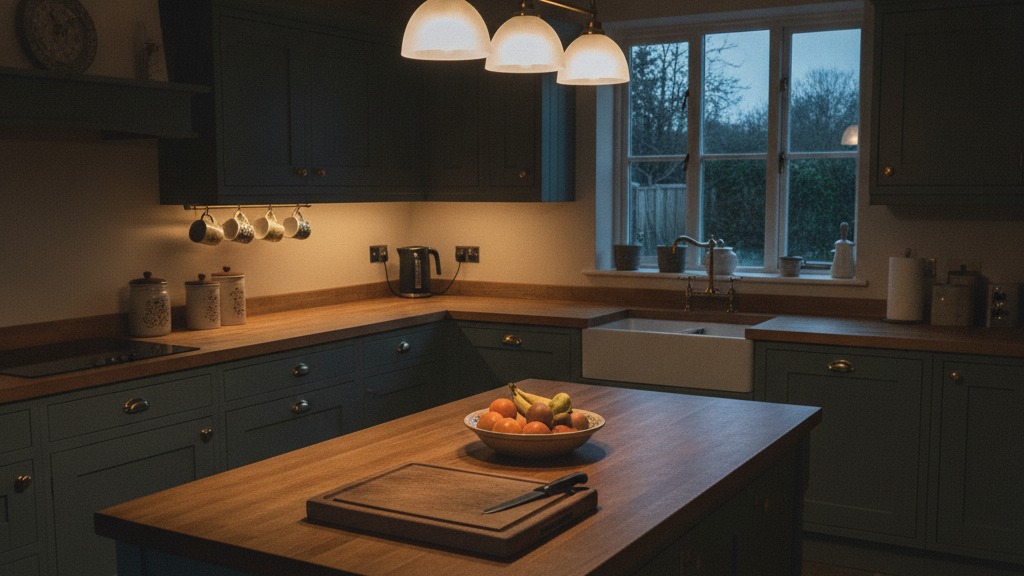
We get asked about lighting more than almost anything else, usually right at the end of a project when the units are already ordered and there’s suddenly a panic about where the sockets and switches need to go. Honest truth is, lighting should be one of the first conversations, not one of the last. Get it right and a kitchen feels warm, useful and genuinely nice to spend time in. Get it wrong and you end up with one bright ceiling light doing every job badly.
In our experience, the kitchens that feel the most finished are the ones with layered kitchen lighting, meaning several separate light sources working together rather than one fitting trying to cover the whole room. It’s not a new idea, but it’s one that’s finally getting the attention it deserves as more homeowners move away from a single central pendant and towards something that actually suits how a kitchen gets used.
The three layers every kitchen needs
There are three jobs lighting needs to do in a kitchen, and trying to make one fitting do all three is where most people go wrong.
- Task lighting for the worktop, the hob and the sink, so you’re not chopping onions in your own shadow
- Ambient lighting for general background light, usually from the ceiling or wider room
- Accent lighting for the bits worth showing off, an open shelf, a glass-fronted cabinet, a kickboard or a nice run of splashback
A kitchen with only the middle layer looks flat and a bit clinical, even if the joinery underneath it is beautiful. Add task and accent lighting and the same room suddenly has depth, warmth and somewhere for the eye to rest in the evening.
Why it has to be planned with the joinery, not after it
We’ve seen this go wrong plenty of times. Cabinets get built and fitted, and then someone tries to retrofit under-cabinet lighting or work out where a pendant should hang over an island that’s already in place. It can be done, but it’s fiddly, it costs more, and it rarely looks as clean as it would if it had been planned from the start.
A good joiner will tell you that lighting needs deciding at the same stage as the cabinet layout, because the two directly affect each other. Under-cabinet LED strips need a channel or recess built into the carcass, not just stuck on afterwards. Pendant lights over an island need the electrician’s first fix done before the ceiling is closed up, and the height and spacing need to match the island’s actual dimensions, not a guess. Kickboard lighting needs a power run at floor level that has to be planned before the flooring goes down.
Get the sequencing wrong and you’re either compromising on where the light goes, or you’re pulling up new flooring to run a cable that should have gone in weeks earlier. Worth getting right the first time.
Under-cabinet and kickboard lighting
This is the workhorse layer and it’s the one that makes the biggest practical difference. A strip of warm white LED tucked under the wall cabinets lights the worktop directly, so you’re not working in your own shadow every time you stand at the counter. It’s the kind of thing you notice every day, especially in winter when the natural light drops off by mid-afternoon.
Kickboard lighting is the quieter cousin. A thin strip along the base of the units at floor level does two things: it softens the whole room by lifting light off the floor, and it’s genuinely useful as a low-level night light if you’re wandering into the kitchen for a glass of water at midnight without waking the whole house. Both need their power and switching planned into the electrical first fix, ideally on a separate circuit or dimmer from the main ceiling lights so they can be used independently.
Getting the colour temperature right
This one catches people out. Cool white light, anything above about 4000K, can make even a beautifully made kitchen feel a bit sterile, more like a hospital corridor than a home. For most bespoke kitchens we’d steer towards warm white, somewhere around 2700K to 3000K, especially for ambient and accent lighting. Task lighting over the worktop can run slightly cooler if you want more clarity for prep work, but keep it consistent across the room. Mixing warm and cool light sources in the same space is one of the quickest ways to make a good kitchen feel a bit off, even if you can’t immediately put your finger on why.
Dimmers make the difference
Put every layer on a dimmer if you can. A kitchen at seven in the morning needs bright, functional light for making breakfast and finding school shoes. The same kitchen at eight in the evening, once the cooking’s done and the wine’s out, wants something softer. Dimmers, and ideally separate switching for each layer, mean one room can do both jobs properly instead of settling for a permanent, slightly-too-bright middle ground.
If you’re at the planning stage of a new kitchen, this is the point to have the lighting conversation, before the cabinet drawings are finalised and definitely before the electrician’s first fix. It costs nothing to ask the question early and saves a good deal of hassle later.
Thinking about a new kitchen or joinery project and want lighting built in properly from the start? Give us a call on 07904 794280 or message us on Facebook, we’re always happy to talk through what’s possible.